> ## Documentation Index
> Fetch the complete documentation index at: https://docs.zocomputer.com/llms.txt
> Use this file to discover all available pages before exploring further.
# Control a computer via SSH
> How to operate another computer using Zo
Connecting Zo to another computer using SSH is risky. By doing so, you are giving your AI unconstrained access to everything on that computer – a ridiculous thing to do, if it's your personal computer.
You should only proceed with this guide if you fully understand the risks and are comfortable with the potential
consequences of Zo making mistakes, or falling prey to prompt injection.
This use case can be an impressive "party trick" (and can be genuinely useful depending on the device you are connecting to), but should not be used regularly unless you are completely comfortable with the security of your setup.
# 1. Generate an SSH key on your Zo
Open the Terminal in your Zo application.
Run the command below, replacing the email used in the example with your own email address.
```sh theme={null}
ssh-keygen -t ed25519 -C "your_email@example.com"
```
When you're prompted to "Enter a file in which to save the key", you can press Enter to accept the default file location.
When you're prompted to "Enter a passphrase", you can press Enter to leave it empty.
Run the command below to view your public key:
```sh theme={null}
cat ~/.ssh/id_ed25519.pub
```
You'll see something like this:
`ssh-ed25519 YOUR_ECDSA_PUBLIC_KEY your_email@example.com`
# 2. Register your public key on your computer
Open your computer's Terminal application.
Run the command below to edit your authorized keys file:
```sh theme={null}
nano ~/.ssh/authorized_keys
```
Paste your public key in the editor.
Save and exit the editor by pressing `Ctrl + X`, then `Y`, and finally `Enter`.
# 3. Enable SSH access to your computer
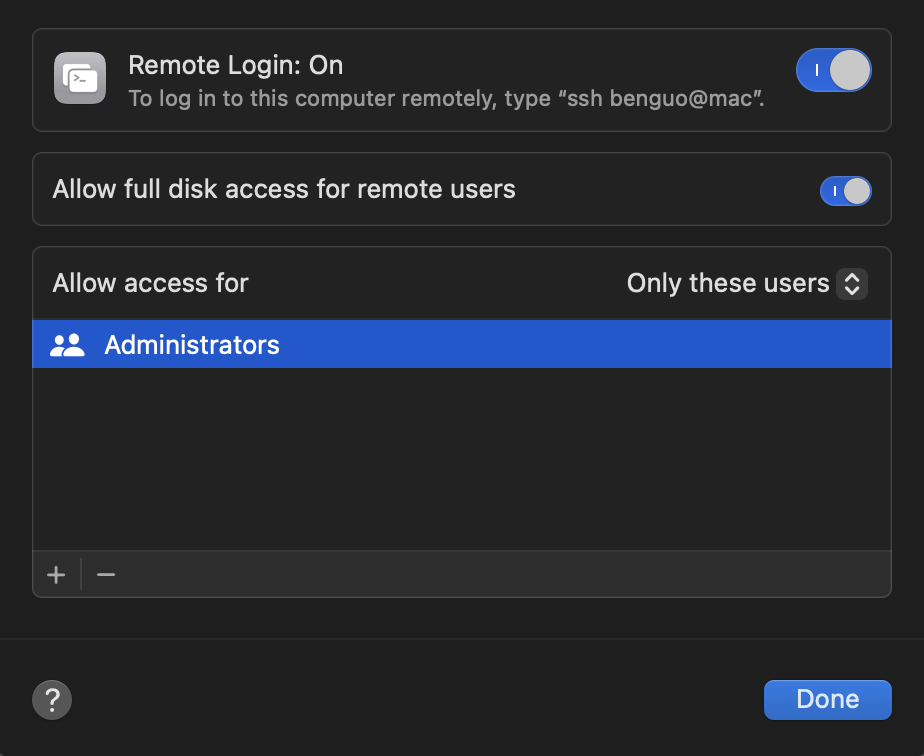
On macOS, you can enable SSH access by [enabling Remote Login](https://support.apple.com/lt-lt/guide/mac-help/mchlp1066/mac) in your System Settings.
 # 4. Set up and run ngrok
To create a tunnel to your computer, you'll need to sign up for [ngrok](https://ngrok.com/).
To install ngrok on macOS, you'll first need to [install Homebrew](https://brew.sh/) by running their install command in your terminal.
Then, you can install ngrok by running the following command:
```sh theme={null}
brew install ngrok
```
Log in to your ngrok account by running the command below, replacing \$YOUR\_TOKEN with the token from your [ngrok account dashboard](https://dashboard.ngrok.com/get-started/your-authtoken).
```sh theme={null}
ngrok config add-authtoken $YOUR_TOKEN
```
In order to avoid having to update your Zo's SSH configuration every time you run ngrok, we recommend [upgrading your ngrok account](https://ngrok.com/pricing) and reserving a [TCP address](https://dashboard.ngrok.com/tcp-addresses) with a fixed URL.
Once you have a TCP address, you can run the following command, replacing the placeholders with the number and port from your TCP address.
```sh theme={null}
ngrok tcp 22 --url=.tcp.ngrok.io:
```
# 4. Connect to your computer
Open the Terminal in your Zo application. Run the command below, replacing the host and port with the values from your TCP address, and the user with your computer's username. (You can run `whoami` in your computer's terminal to find your username.)
```sh theme={null}
ssh -p @
# example: ssh -p 20000 you@5.tcp.ngrok.io
```
If all is well, you should find yourself inside your laptop in your Zo's terminal.
You can exit the SSH session by typing `exit` or `Ctrl + D`.
## Create a shortcut to connect
In your Zo application's terminal, run the command below to edit your SSH configuration file:
```sh theme={null}
nano ~/.ssh/config
```
Paste the following configuration, replacing the Port, HostName, and User with the same values from the ssh command you used above:
```sh theme={null}
Host laptop
HostName
Port
User
ServerAliveInterval 30
ServerAliveCountMax 3
IdentityFile ~/.ssh/id_ed25519
```
Save and exit the editor by pressing `Ctrl + X`, then `Y`, and finally `Enter`.
Now, you can run `ssh laptop` to connect to your computer from your Zo's terminal.
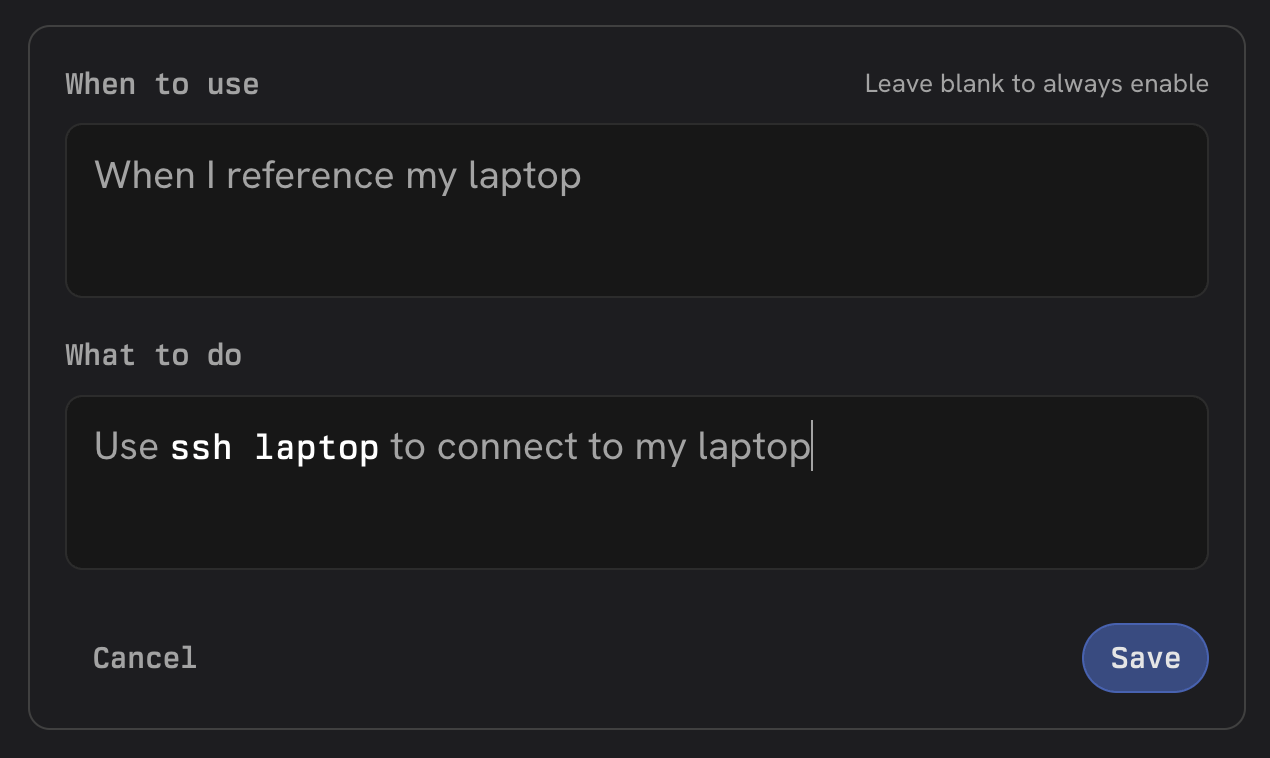
To tell Zo how to connect to your computer, you can [create a rule](/rules) instructing Zo to use `ssh laptop` to connect to your computer.
# 4. Set up and run ngrok
To create a tunnel to your computer, you'll need to sign up for [ngrok](https://ngrok.com/).
To install ngrok on macOS, you'll first need to [install Homebrew](https://brew.sh/) by running their install command in your terminal.
Then, you can install ngrok by running the following command:
```sh theme={null}
brew install ngrok
```
Log in to your ngrok account by running the command below, replacing \$YOUR\_TOKEN with the token from your [ngrok account dashboard](https://dashboard.ngrok.com/get-started/your-authtoken).
```sh theme={null}
ngrok config add-authtoken $YOUR_TOKEN
```
In order to avoid having to update your Zo's SSH configuration every time you run ngrok, we recommend [upgrading your ngrok account](https://ngrok.com/pricing) and reserving a [TCP address](https://dashboard.ngrok.com/tcp-addresses) with a fixed URL.
Once you have a TCP address, you can run the following command, replacing the placeholders with the number and port from your TCP address.
```sh theme={null}
ngrok tcp 22 --url=.tcp.ngrok.io:
```
# 4. Connect to your computer
Open the Terminal in your Zo application. Run the command below, replacing the host and port with the values from your TCP address, and the user with your computer's username. (You can run `whoami` in your computer's terminal to find your username.)
```sh theme={null}
ssh -p @
# example: ssh -p 20000 you@5.tcp.ngrok.io
```
If all is well, you should find yourself inside your laptop in your Zo's terminal.
You can exit the SSH session by typing `exit` or `Ctrl + D`.
## Create a shortcut to connect
In your Zo application's terminal, run the command below to edit your SSH configuration file:
```sh theme={null}
nano ~/.ssh/config
```
Paste the following configuration, replacing the Port, HostName, and User with the same values from the ssh command you used above:
```sh theme={null}
Host laptop
HostName
Port
User
ServerAliveInterval 30
ServerAliveCountMax 3
IdentityFile ~/.ssh/id_ed25519
```
Save and exit the editor by pressing `Ctrl + X`, then `Y`, and finally `Enter`.
Now, you can run `ssh laptop` to connect to your computer from your Zo's terminal.
To tell Zo how to connect to your computer, you can [create a rule](/rules) instructing Zo to use `ssh laptop` to connect to your computer.
 Your computer must remain turned on with ngrok running and connected to the internet in order to connect to it from
your Zo.
Your computer must remain turned on with ngrok running and connected to the internet in order to connect to it from
your Zo.